Post #17 by Roger:
Do you have pictures and more explanation as to how to complete this repair in the future?Repair starts with prep cleaning - using dInk7.7 follows by clean3.8 and rinse3.0.
Not with solvent, alcohol or alkaline cleaners - using these makes the leather stiffer, weaker and more prone to repair failure too soon.
The criteria of repair in high use areas is determine by the number of flexes it can withstand.
The softer and suppler the entire panel is, the more flexes it can take; the less chance it will crack again.
So keeping the leather supple and soft is the only way to prevent cracking through periodic fatliquoring.
Follows by proper hydration with relaxer3.3 and seal off tight against evaporation overnight.
Squeeze moist of excess water then fatliquor with fatliquor5.0 seal off and left overnight too.
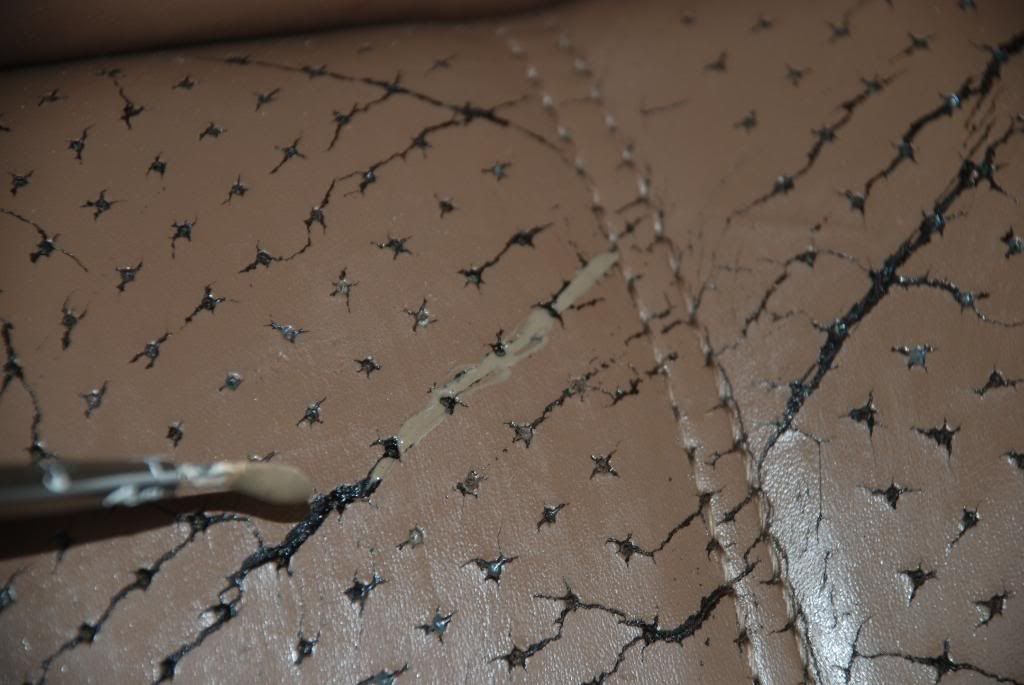
When dry the crack is ready for repair:
The following are the picture steps I practice.
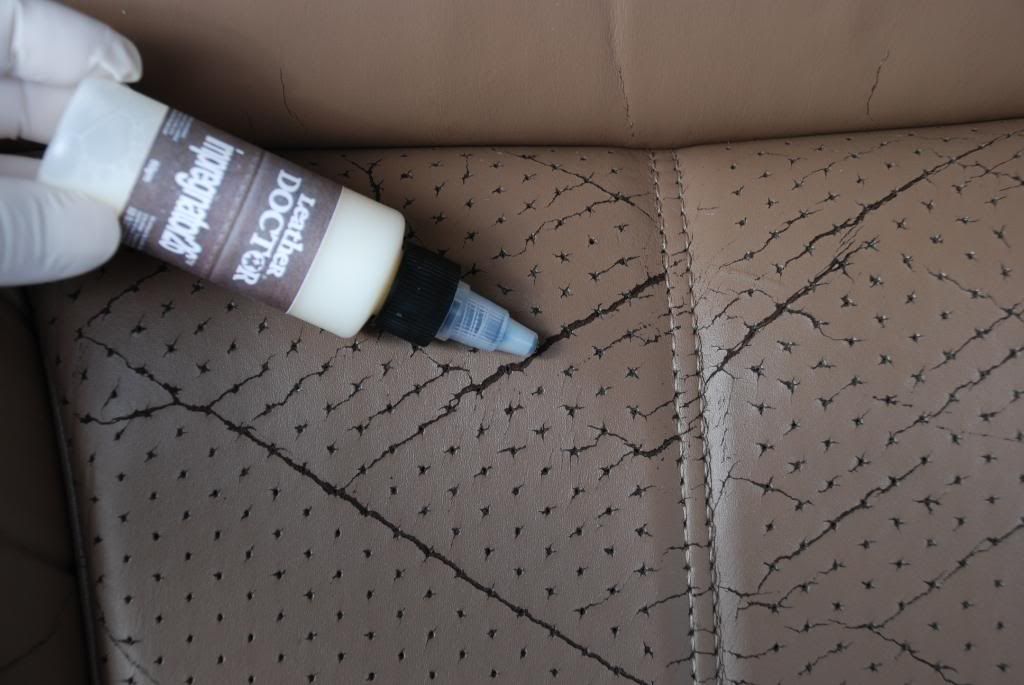
#1: impregnator26 application - to tighten and strengthen the leather structure inter-fibrillary spaces, thus becomes part of the leather.
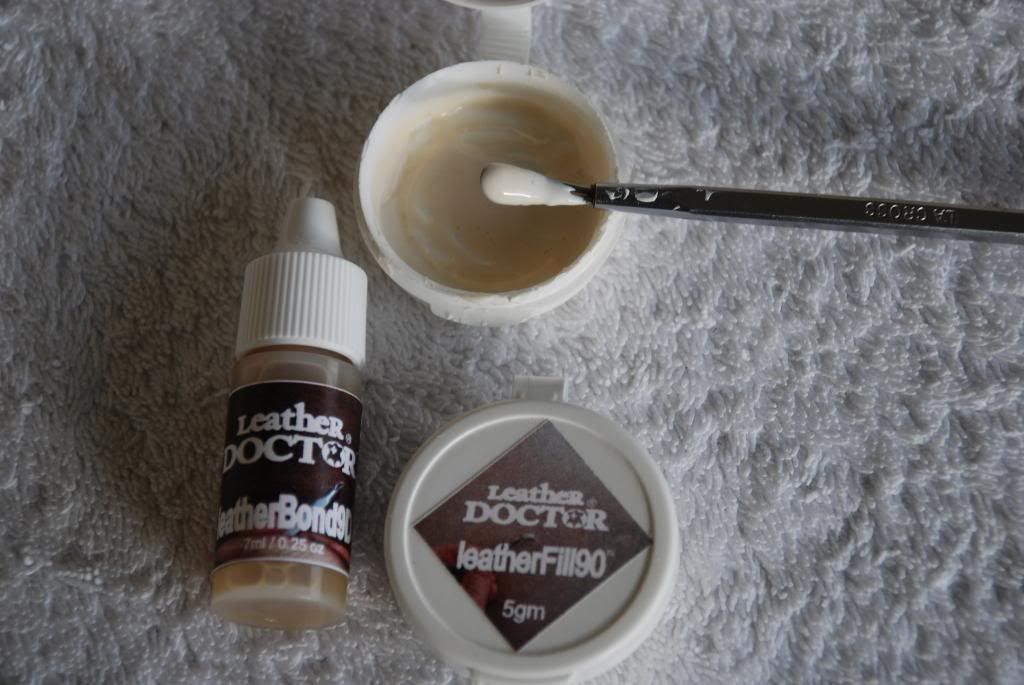
#2: leatherBond3D application - to fill the crack with strength and flexibility without ever cracking itself.

#3: leatherBond3D/ LeatherFill90 mix - to add solid to the mix.
#4: leatherBond3D/ LeatherFill90 / color mix - to add color to the mix.
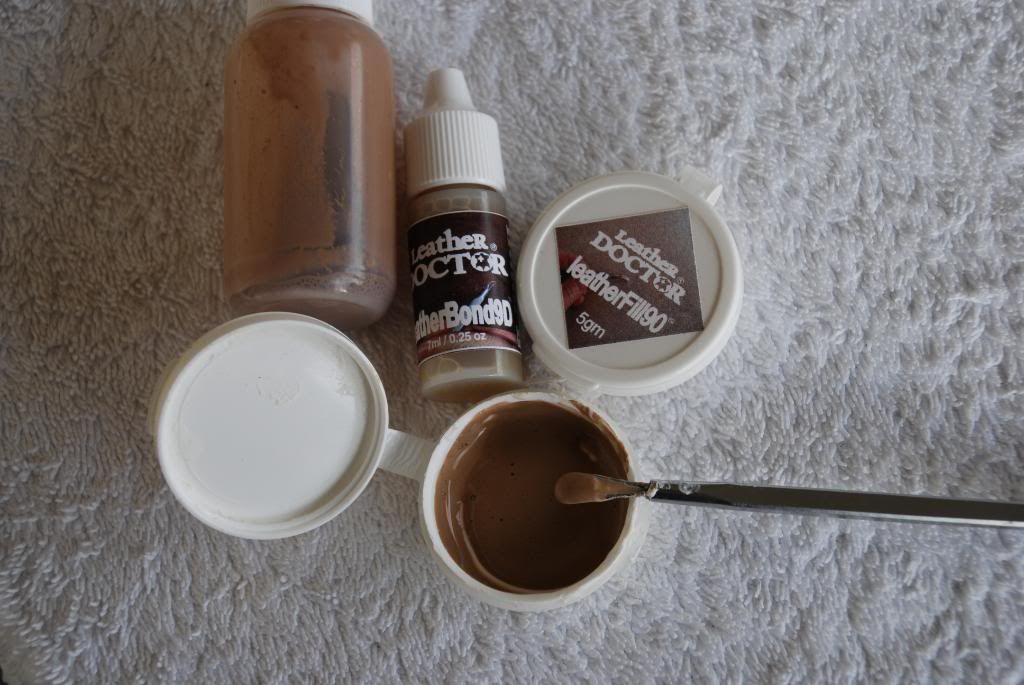
#5: Application with leatherTool6 to the crack.